5 Types of Watercolor Charts - Type 1: Basic Color Chart
I know you’ve seen them: a full page of squares in all colors, rainbow pie charts, a gradient of ombre colors marching perfectly in-line. You’re drawn to them, you want to get your paints out and make rainbows, too. I know, so do I!
Why are there so many different kinds?
There’s a lot of information out there on how to create watercolor charts - the idea behind them all being similar: get to know your paints and discover all about colors.
The thing is, I noticed when I was first starting that there were charts of all types, in different formats. They seemed to have different purposes and after some research, I figured out what purpose each chart served and why there were helpful.
I’m going to walk you through the 5 Types of watercolor charts that I think are most typical AND useful in a blog post series. Some of them technically aren’t even charts, but we’ll get to that.
Today, I’ll be going over the most basic and easiest-to-make chart: the basic color chart.
Basic Color Chart
The basic color chart is exactly that: a chart of all your basic colors. In other words, you get out your collection of paint and you make a chart of all the colors straight out of the tube/pan/palette. There is no mixing involved, except if you count mixing with water.
Dried watercolors never look the same in the palette as they do when mixed with water and applied on paper. You’ll need a basic catalog of all your paint colors so you know what they actually look like before you paint with them.
It’s pretty straight forward and everyone has their own way of making these. You’ll likely develop your own system and stick with what works for you, but for this post I’ll give you a few ideas and walk you through the way I like to make mine as a reference.
Supplies Needed:
Besides the obvious paints, paper and a brush, you'll need a few other materials to make your charts. I'll list all of them below with a few recommendations:
watercolor paints
watercolor paper (140lb/300 gsm)
watercolor brush (size 6 or 8)
ruler
pencil (2B)
waterproof pen (optional)
water
paper towels
Option 1: The Master Color Chart
The most straightforward way to create a color chart is to count how many colors you have, draw a grid with that same number of squares or more.
I’d recommend a grid with squares at least 3/4” x 3/4” and follow the steps below:
Draw grid on watercolor paper
With your waterproof pen write the name of each color you will be painting inside each box. If you are not using a waterproof pen, just write at the top or bottom of the box and avoid painting over it with paint. (Note that some paints are opaque and you may want to avoid completely painting over the names anyways.)
Paint each color in your palette into each corresponding box, making sure to rinse your brush well when changing colors.
Save for reference when you paint. If you have empty squares, add to your chart when you add new colors to your collection in the future.
Option 2: The Palette Color Chart (Recommended)
Whether you have a palette with pans that have been prearranged or a empty palette with wells that you fill yourself using tube watercolors, this is the way I prefer to create color charts for reference.
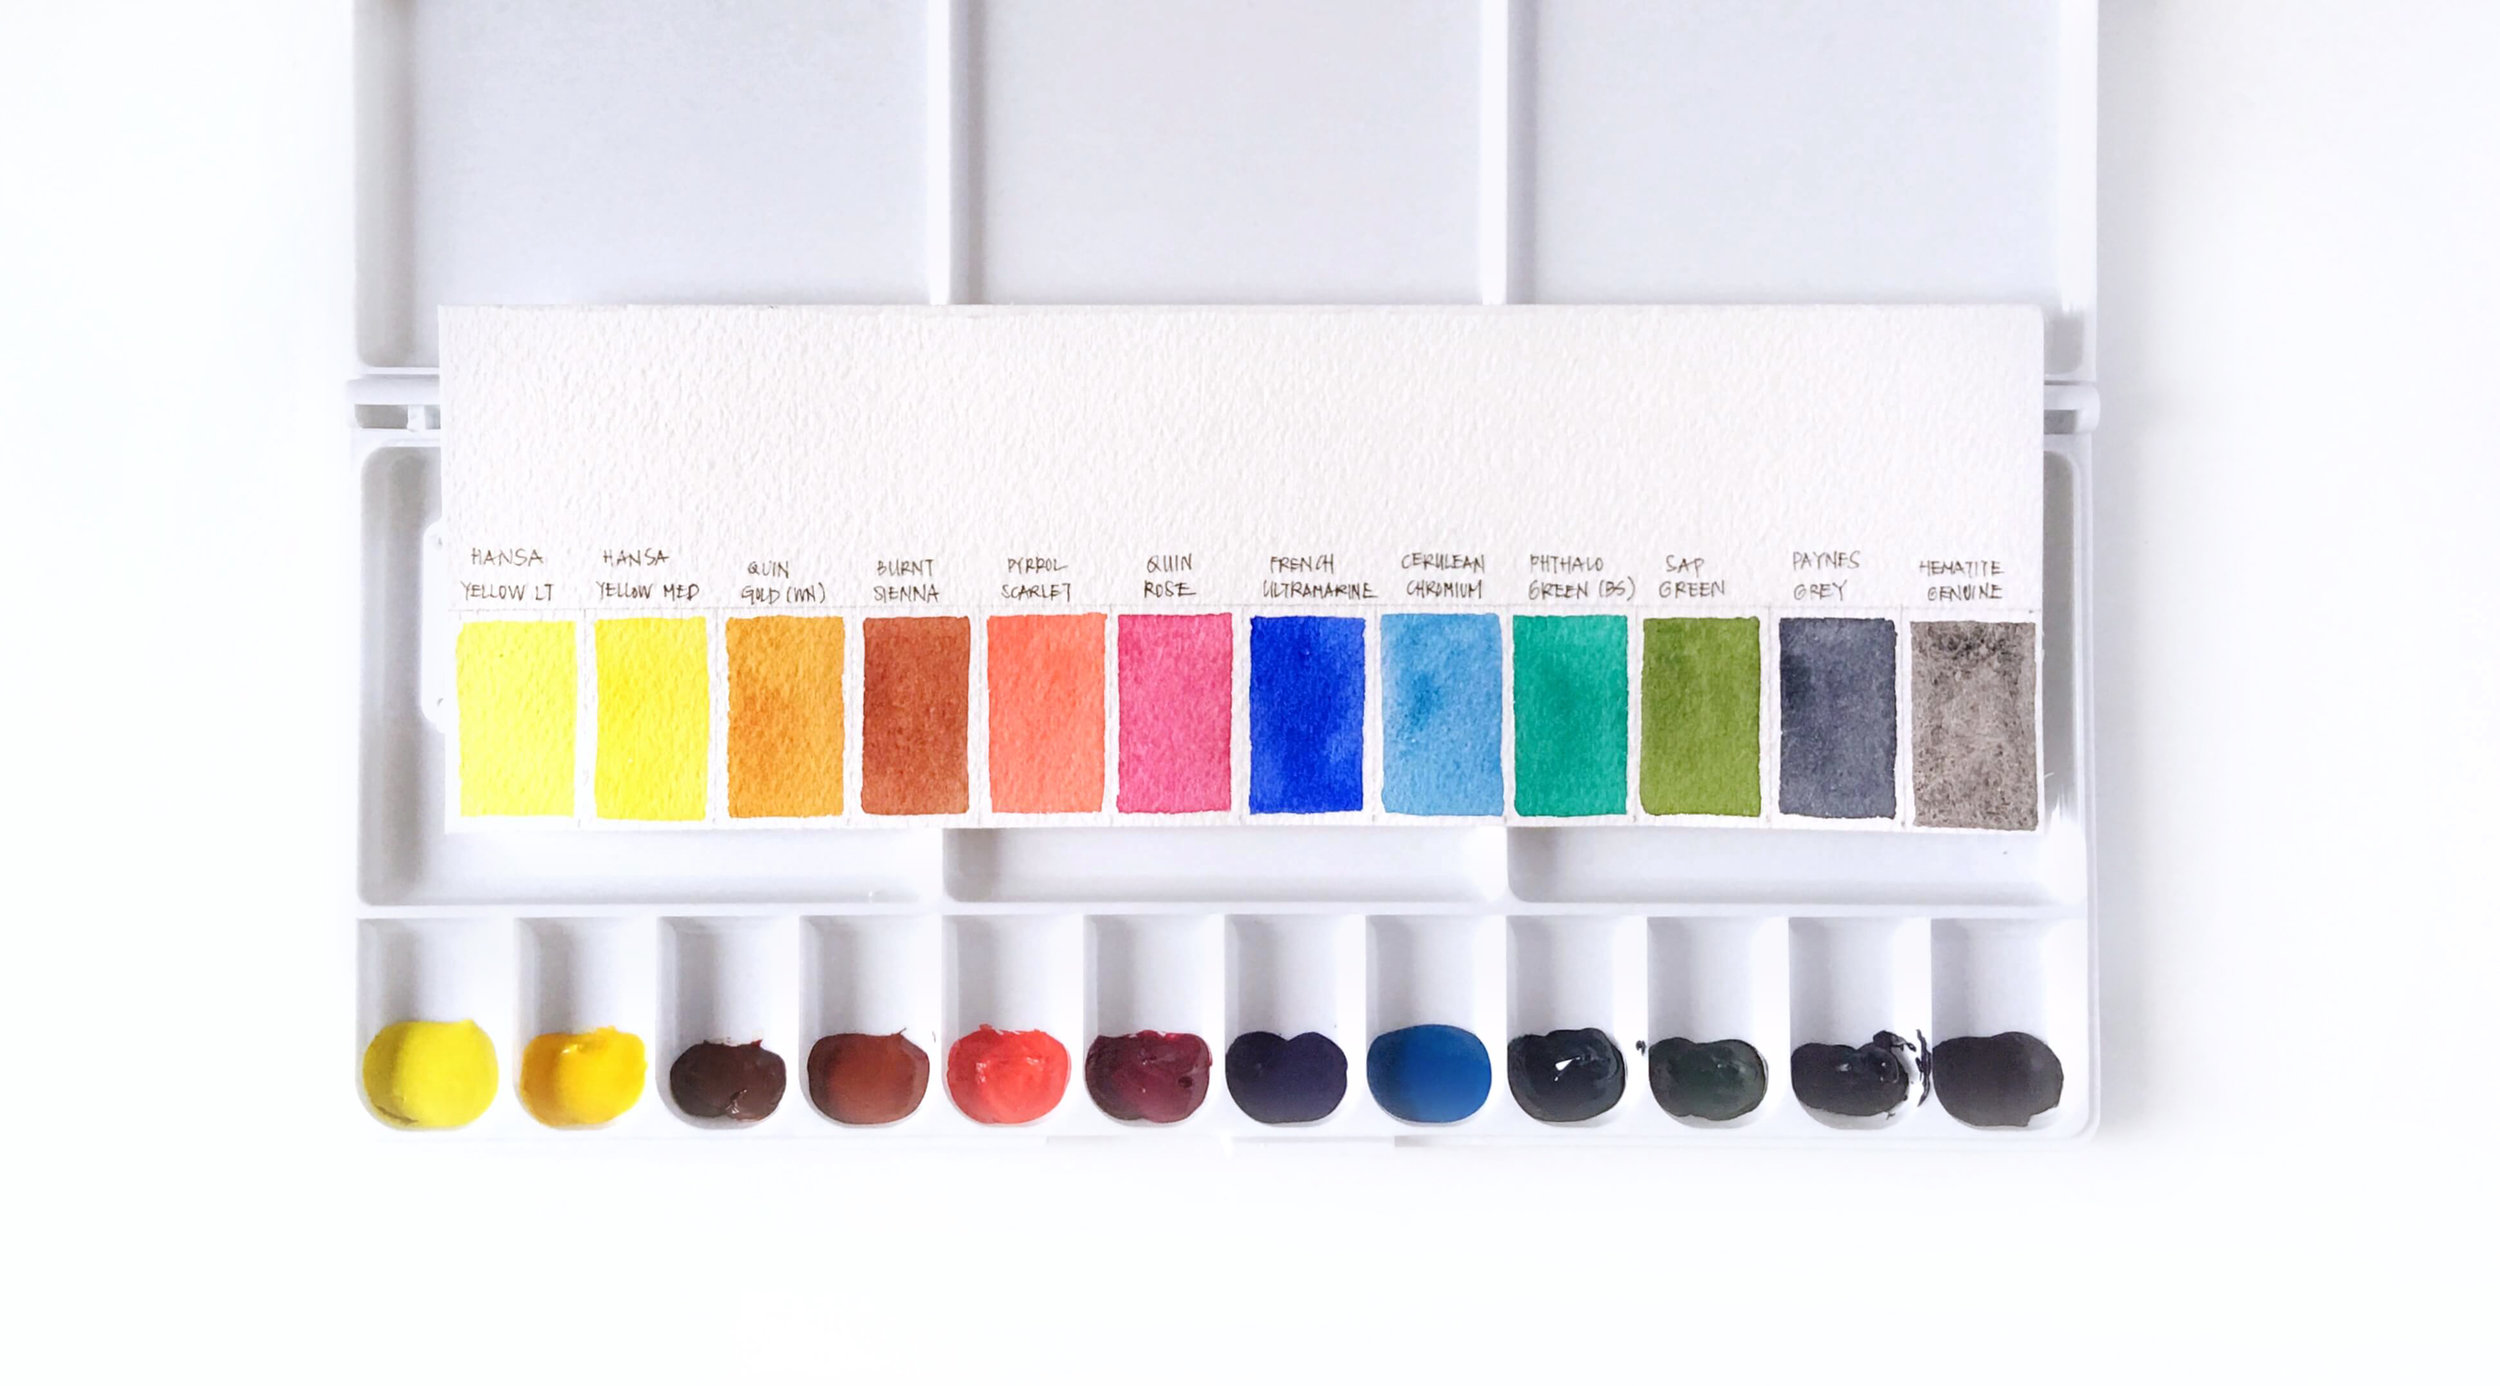
The idea is that you are creating a basic color chart that serves as a legend or map of your actual palette. You’ll need to look at the layout of your palette and draw a grid that represents how the paints are arranged.
For my 12-color palette, I use a 3” x 9” scrap piece of Arches 300lb Cold Press watercolor paper to paint a palette color chart.
Along the 9” length, I divide it into 3/4” segments and then draw a line 1-1/4” up, parallel to the length of the paper. This creates 12 rectangles, each 3/4” wide x 1-1/4” tall.
According to the order in my palette, I swatch each color - making sure to rinse well when changing paint colors. After it dries, I write the names of each color above the swatches (or write them as you go if you’re afraid you’ll forget!)
I like to keep the chart with my palette for reference. If I change out colors in the future, I’ll just make a new one. I’ve thought it might even be fun to date these to see if my color preferences change over time.
If your palette has a funny layout, like my 24-well folding palette does, you can draw a corresponding grid layout that matches the layout of the palette. See below for what I did:
If you haven’t created a basic color chart for your own colors yet, this would be an easy and fun project to do today!
I’ll be continuing this series on a weekly basis and will be back here next week with watercolor chart type 2. Let me know in the comments below if you’ve tried this or have any tips for me on how you make your basic color charts!
Lastly, if you liked this post, subscribe to my email list (just enter your name and email below) to be updated with the latest info about watercolors. I also send out tips, lessons learned and other useful information to subscribers that I don’t always plan on posting here!
Thanks for reading!
Susan


