
Behind the Scenes: Custom Ultrasound Watercolor Art
I’m still not sure if “behind the scenes” is the right term for this but in today’s blog post and video I am sharing the story behind where the idea of painting these watercolor ultrasounds came from and the process of how I paint them.
So where did this idea come from?
Well - it wasn’t an “idea” that I came up with while brainstorming one day or anything. And to be honest, I love that it didn’t originate that way.

WHERE THE IDEA CAME FROM…
If you know me or have been following along with me on Instagram for a while, you’ll know I don’t post many photos of myself. Like many of you, when I stared posting creative work to Instagram I was very self-conscious. Sometimes I still am! Posting photos of myself is an even larger hurdle to overcome. But something that I think I’m ever-so-slowly getting over.
So when I decided I wanted to share about our pregnancy the thought of posting a photo of myself was already out of the question, but I also didn’t want to post a glossy, wrinkled picture of my ultrasound either. It just made sense to paint my sonogram photo using watercolors because, well, that’s what I do.
I didn’t even think it was going to be good or that I would frame it. It wasn’t even something I thought of as a personal piece of art that I was painting for myself!
In fact, I painted it in the corner of a pad of paper and later when I tried cutting it out to frame there wasn’t even enough breathing room around it to make it a decent size for framing.

I posted this little painting to Instagram and thought nothing of it. But then… among the overwhelming amount of sweet, congratulatory messages I got, I also received many private messages and comments asking if I sold paintings like this.
It was then that I thought about how special it would be to be able to paint ultrasounds for other expecting moms. And after a week or so of planning out all the details of how I could offer this, I was ready to open up a handful of custom commissions.
I’m still in what feels like an exploratory phase for this service. But what I do know is that each one I paint feels really special. And like anything else I take the time to paint, it allows me to slow down and really observe.
When I spend time with each painting, I get to know the baby’s profile and proportions. I wonder what he or she will look like at birth. I wonder whether or not he or she will look more like the mom or dad. And I know now how special this little image can be. Especially after going through it myself.
Painting process
I filmed the process of painting one of these ultrasounds so I could share it with you. But since the whole process takes a while, I sped it up and made it a time-lapse video.
If you’re thinking of painting one of these for yourself and wanted to understand my process and what supplies I use, here’s a breakdown:
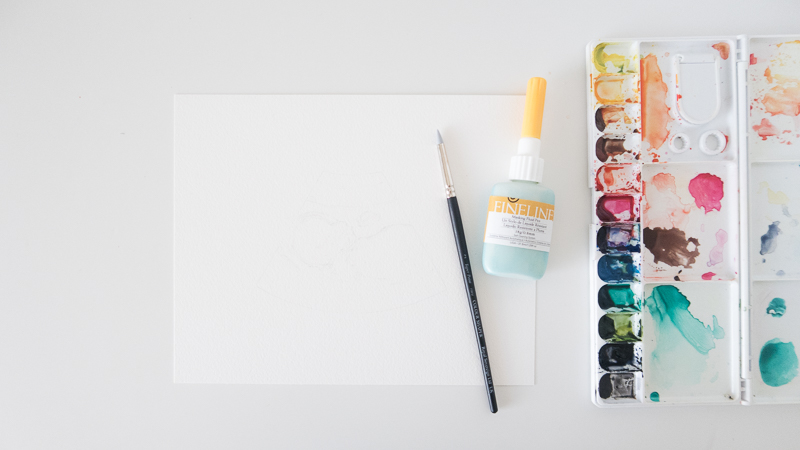
SUPPLIES
2B Pencil - Prismacolor Turquoise
Plastic Eraser - Tombow Mono
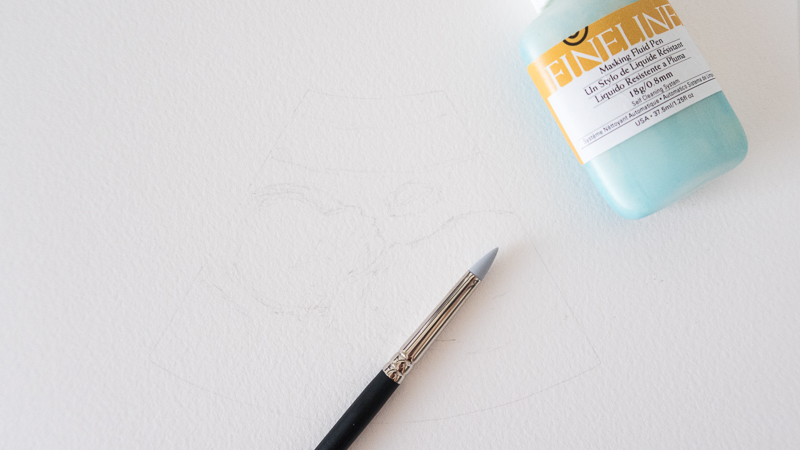
Masking Fluid - Fineline
Size 2 Colour Shaper (Taper Point, Firm) - used to apply the masking fluid
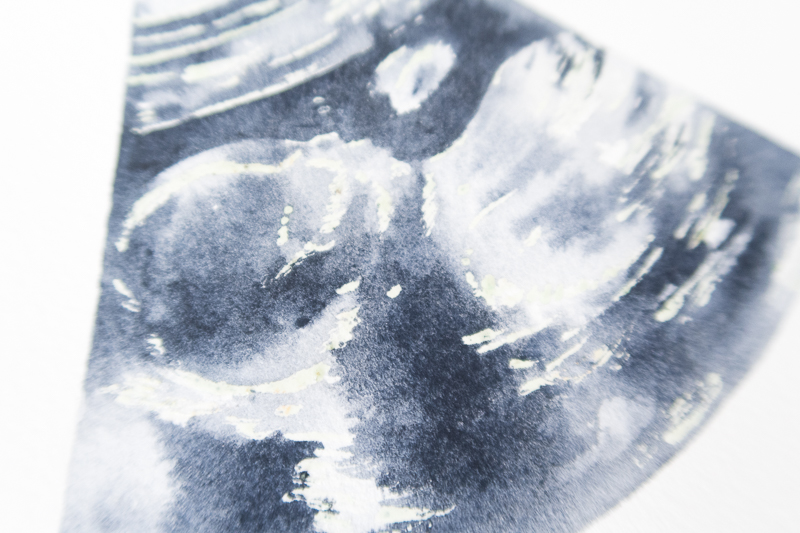
Payne’s Grey - Daniel Smith Extra Fine Watercolors
140 lb Arches Cold Press Watercolor Sheet in Bright White - Cut down to 8x10
BASIC STEPS
Light pencil sketch of ultrasound
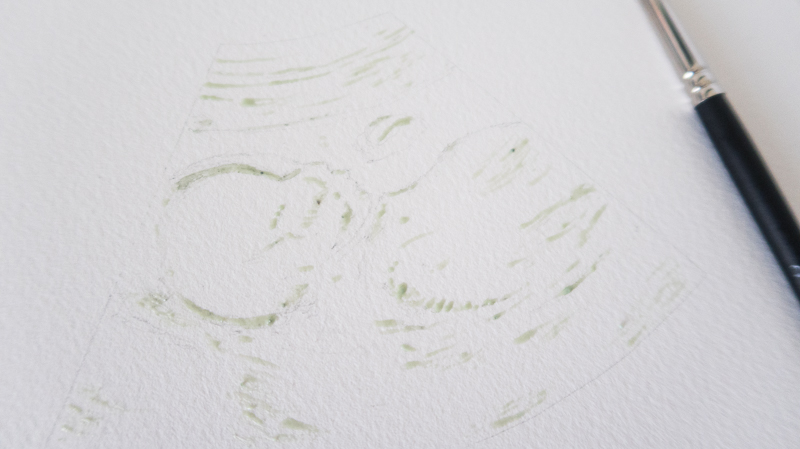
Use masking fluid to protect the whitest areas, let dry completely.
Paint using wet-on-wet technique, let dry completely.
Remove masking fluid with eraser or rub off with clean fingers
Touch up any required details

WATCH A VIDEO OF THE PROCESS

I hope that this has been helpful and interesting for you to see what goes into these paintings!
If you’re looking for my shop listing, you can check it out here!
As always, thank you for reading and watching!
Susan