
How To Make Simple But Useful Watercolor Swatch Cards
This post has been updated: November 2018
In the blog post below, I show you how I make my watercolor swatch cards, what information it shows you about the paints, and why you might want to make them. At the time of writing the original post, I had made 80 cards by hand! If you have a nice curated set of paints (a.k.a. a reasonable number of paints), the below method will not feel as daunting.
However, if you have a lot of paints to swatch, the idea of hand drawing a grid on every single card may feel like a waste of time, or just boring and tedious. Even if it’s TOTALLY worth it in the end!
I was telling friend about how I couldn’t believe I took the time to hand draw all of those cards. I mean…what was I thinking!?
This friend offered up a brilliant suggestion: design a stamp and STAMP the grid on the card using waterproof ink.
Why this didn’t cross my mind before I have no idea. I had gotten custom stamps made before. Multiple times. In fact, when I was in the midst of making these swatch cards, I even created a digital PDF and attempted printing on watercolor paper (which was a big fail, by the way - I should have known ink jet printer ink would bleed). At the time, a stamp still didn’t cross my mind. So what did I do? I proceeded to draw them all by hand.
The end of the story goes: I got a stamp made so I don’t have to continue drawing cards in the future and I added a little process video for how I use my stamp. You can watch it at the end of the post!
Read on if you want to know how I make these cards and why you might want to make some of these yourself!
I’m excited to finally be sharing this blog post all about my watercolor swatch cards. This post will walk you through you how I make them, what they tell me about the paints, and how I organize them for storing and easy reference.
At this point my swatch card collection contains 80 cards even though I don’t own 80 tubes of paint! More than 50% of the colors are from paint samples given to me by watercolor artist friends.
So I know you probably have some paints to swatch, so let’s get started!

WHY MAKE SWATCH CARDS?
If you’re new to swatching, the reason for making swatch cards is to discover and document a paint color’s unique characteristics - both visually and with notes.
Here’s a list of the characteristics I document on my swatch cards:
Paint Color Name
Paint Brand/Manufacturer
Full Color Wash
Gradient Wash
Opacity
Staining/Lifting
Pigments
Granulation
Lightfastness
I’ll go a little more into detail about the characteristics as I explain the layout of my cards below.
SWATCH CARD LAYOUT
Below is a diagram example of how I layout my swatch cards:

Paint Color Name + Brand/Manufacturer (abbreviated):
For example, my naming system goes likes this:
DS = Daniel Smith
WN = Winsor & Newton Professional
WN-C = Winsor & Newton Cotman.Full Color Wash:
A fully saturated flat wash of color. This shows you what the paint color will look like when used at it’s full saturationGradient Wash + Opacity Test:
This box does double duty, the gradient wash gives you an idea of the range of values that this paint can produce, from full saturation to a very light wash.The two black lines, ones darker and one lighter, help demonstrate how translucent or opaque the color is.Lifting Test:
This little strip tells you how staining the paint is. When I’m painting the full color wash, I also fill in this box to give it time dry. You want to wait until this box is dry before using a clean brush dipped in water to “scrub” away the paint and see how much of it ‘lifts’ from the paper. A non-staining paint will allow a lot more lifting than a staining paint.Pigments:
These are the pigments used in the paint to create the color. Pigments are noted using the following prefixes followed by a pigment number, for example: PG23.
The prefix denotes the color family:
PR: Red
PO: Orange
PY: Yellow
PG: Green
PB: Blue
PV: Violet
PBr: Brown
PBk: Black
PW: White
Usually written directly on the tube of paint, you can find it there or by looking it up online.
For example, Google: “Daniel Smith Watercolor Characteristics” for example. You should be able to find a chart of paint colors with all of the paint characteristics.
On the back of my cards I’ll jot down a few notes and symbols about the color characteristics. If available on the manufacturer’s site, I like to note:
Lightfastness Rating
Staining Rating
Granulating (Yes or No)
Transparency (Symbol)
Now that you know why we make them and what the purpose of each note is for on the cards, I’ll go through how I make and organize mine.
WATERCOLOR SWATCH CARD SUPPLIES
Watercolor Paper:
Keep in mind I like to use the same paper for all of my swatch cards so you might want to put a little bit of thought into this before you start cutting your cards! I use Arches ColdPress 140lb.Paper Cutter:
I cut down my cards before drawing the boxes onto them and use this paper cutter to do it. If you don’t have a paper cutter, use a razor blade and a metal ruler.Waterproof Pen:
Find a waterproof pen that you like that will write well on the textured watercolor paper surface. I recently was gifted this fountain pen by my friend and it’s hands down my favorite so far. I wish I had it when I was drawing up my first batch of cards!Ruler:
I love using this clear ruler because I can see through it and it helps me draw out my templates more quickly.Watercolor Brush
Your Paints (of course)
Water cups + Water
Paper Towel
Plastic Sleeves for Storage:
I store my swatches in these plastic sleeves for easy viewing and reference. I love how they look all nice and organized.
DRAWING UP SWATCH CARDS
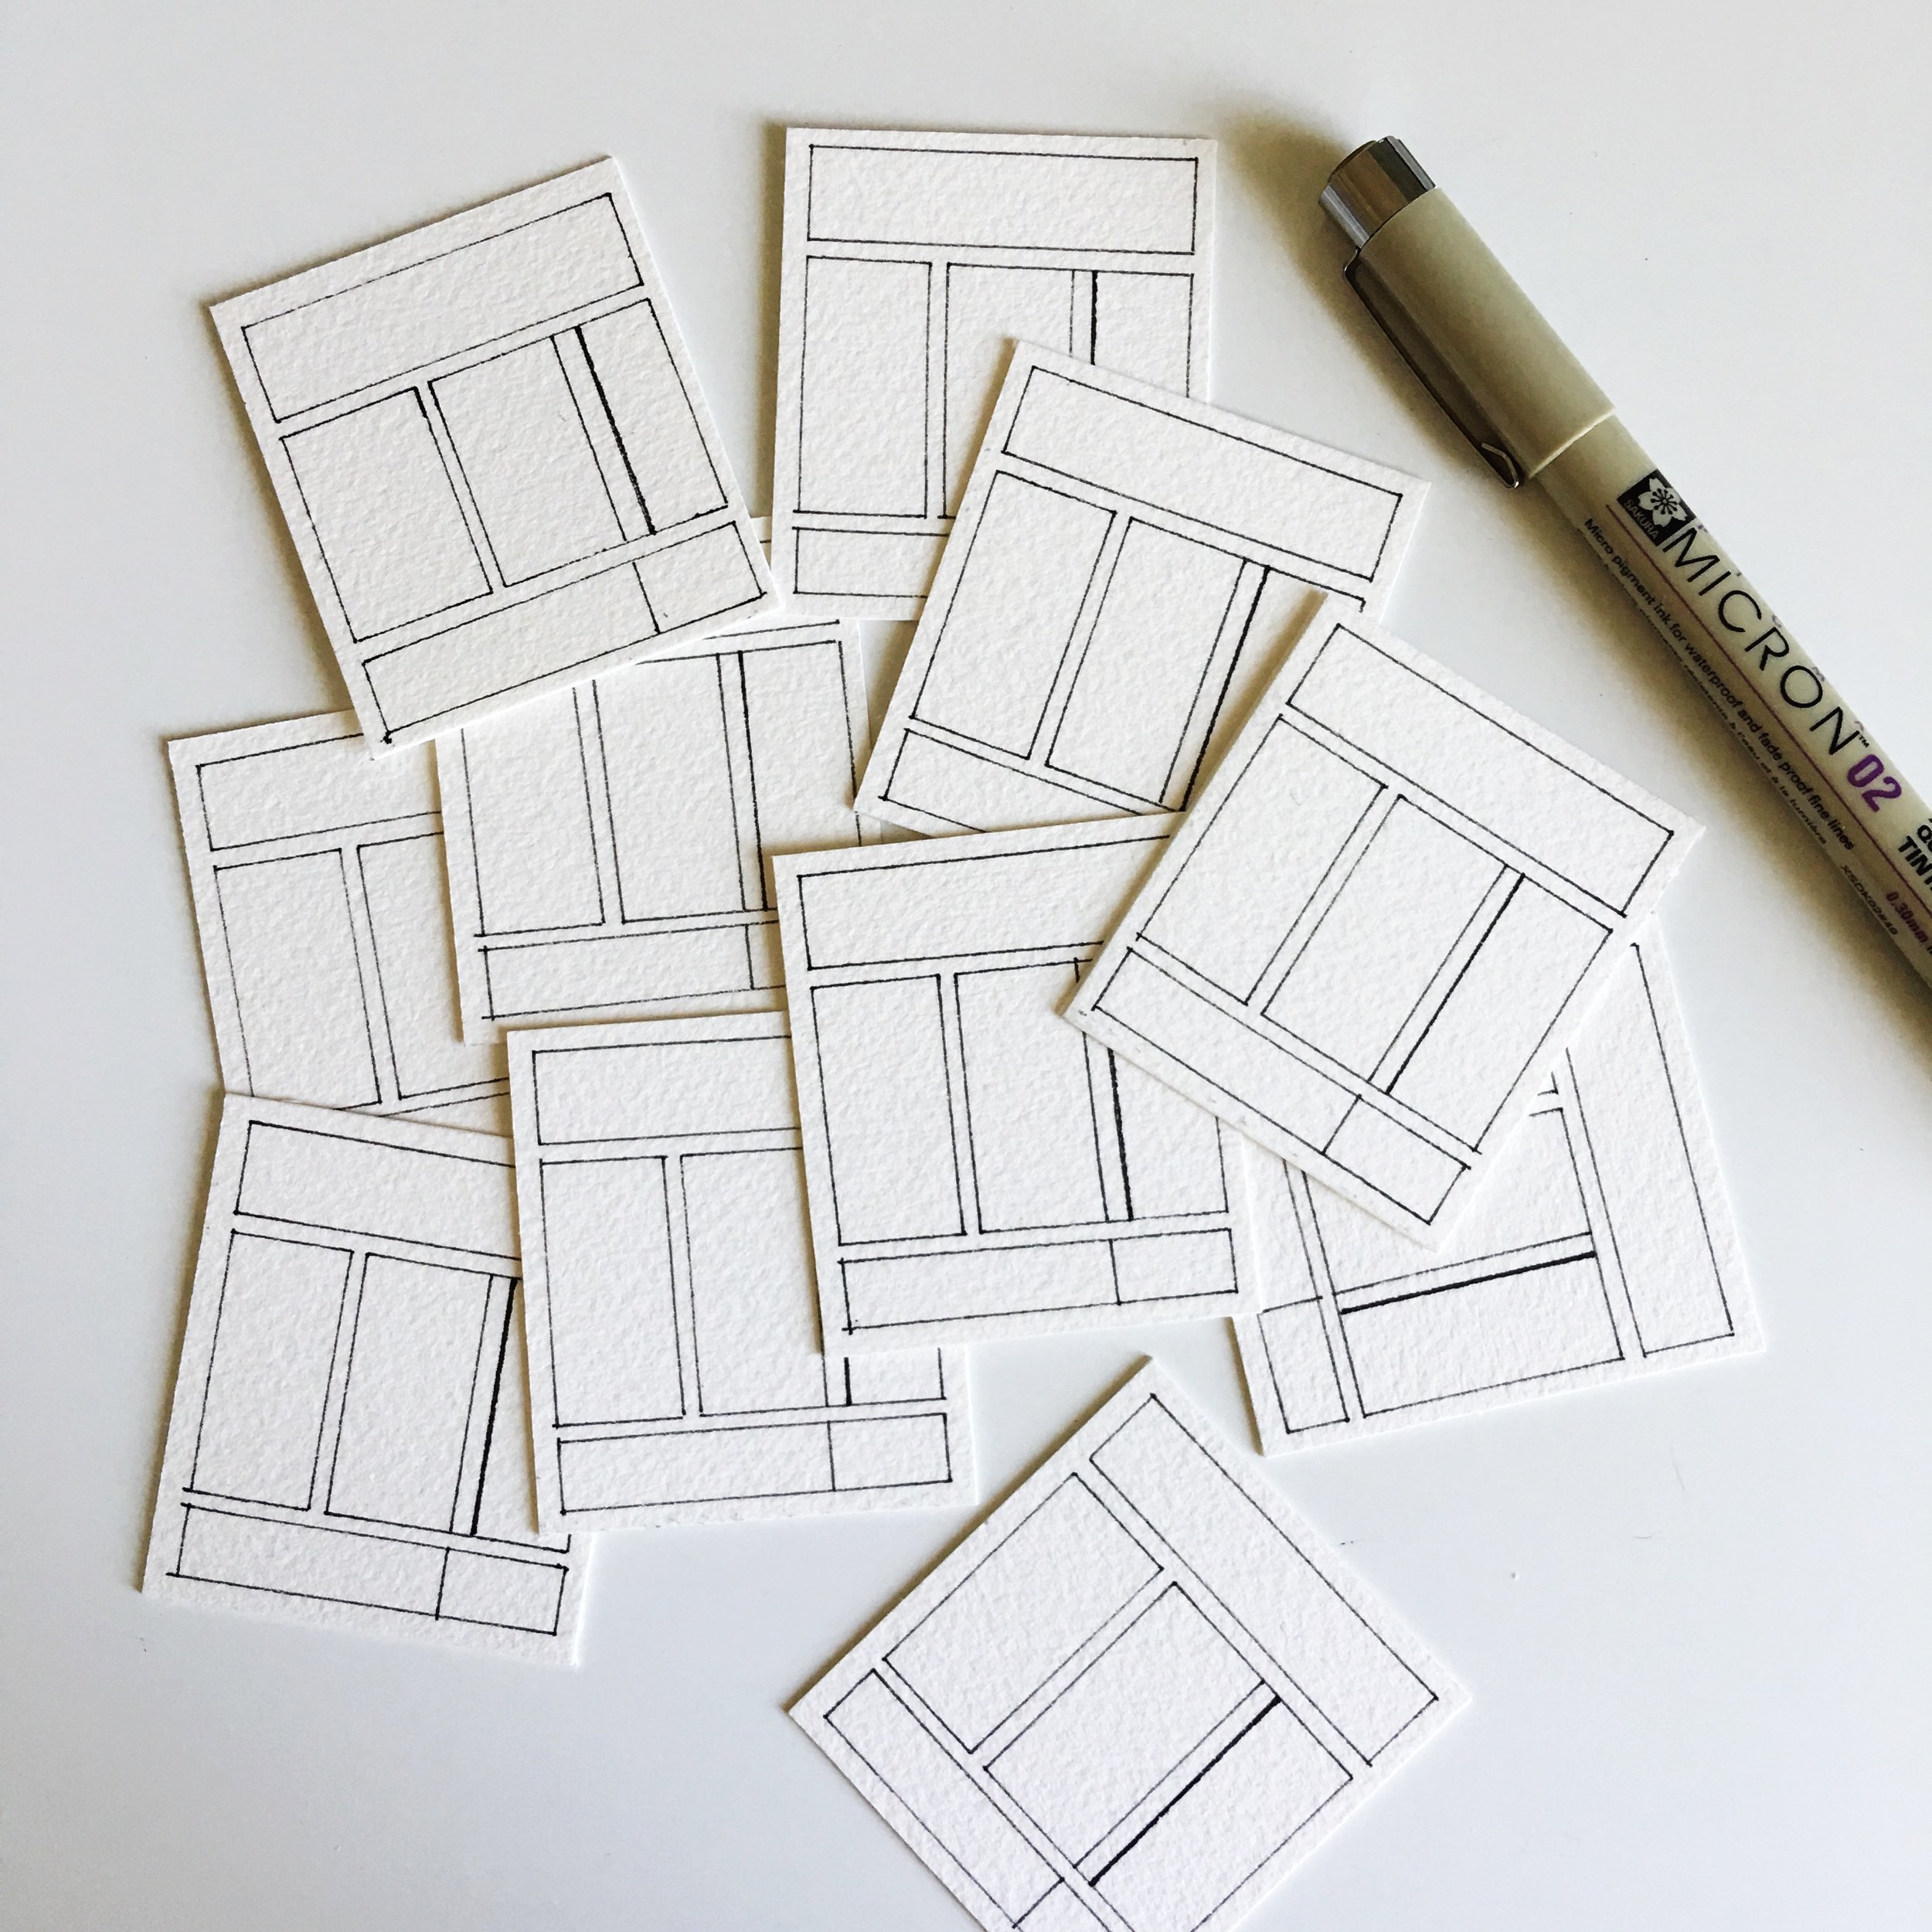
Ok, so real talk - this is a very repetitive and tedious task - especially if you have a lot of cards to make.
I like to do this while listening to podcasts or music and just zone out for a little since I would rather batch create them than draw them every time I get a new color.
My swatch cards are 1.75” wide x 2” tall, but if you are using the same sleeves that I use, you can cut them at exactly 2”x2” square. For some reason I started making them at this dimension and decided to just stick with it for consistency.
My suggestion is to draw out a template card for your own reference so that each time you have to draw a batch of cards, you have something on hand to reference for any measurements.
Another thing you can do is find a piece of cardstock and make your own template by cutting out the boxes and creating a stencil.
But the easiest way to make these cards is using a stamp! This is what I do now - you can scroll to the bottom to watch a video on how I use my stamp.
MAKING YOUR SWATCH CARDS
Now that you’ve drawn out all your cards (with the waterproof pen!) it’s time to *actually* make your cards, which I think is the best part.
The first thing I do is write all the color names, manufacturers, pigments, and any additional notes.
Once I’ve done this, I go back and paint all of the cards. This is the order I go in:
1. Full-Color Wash
2. Lifting Test (using the same Full Color) - let this dry
3. Gradient Wash
4. Come back and do the lifting test, if dry. Otherwise, I come back and do all of the lifting tests at once.

STORING YOUR CARDS
You can organize your cards into your sleeves in many different ways, but I like to organize them by brand and then color.
For example, I like to put all of my Daniel Smith Colors together and then I sort them into color families. I put all the yellows together, pinks/reds, blues, greens and so on.
FREE DOWNLOAD: SWATCH TEMPLATE
I created a download with templates that you can use to trace over or cut out as a stencil. Enter your information below to download it!

Update: November 2018
MY UPDATED METHOD: STAMPING SWATCH CARDS
While there is nothing wrong with drawing up your swatch cards, I have a new way of making them that is much more time-efficient and so much easier! I got a custom stamp made of my template and I filmed a video to show you how I stamp my cards - click below to watch!

