The Ultimate Guide to Watercolor Papers for Beginners
If there is one watercolor supply you shouldn’t skimp on, it would be paper. Good watercolor paper is, hands-down, the most important factor to success with watercolors. I think there are many others out there that would agree with this statement! I’ve read it for myself on numerous blogs, in facebook comments, and even when chatting with fellow painters.
Once you experience quality watercolor paper, it’s like a lightbulb goes off and you realize: THIS is why people love watercolor painting.
So if you’re just getting started with watercolors maybe you’ve come across terms like stretching, paper-weight, blocks, and sizing, and it seems unclear where you should start and WHY these are important. So I’ve broken down the basic aspects that are important in watercolor papers below along with a graphic summary. Hopefully this will help make sense of it so you can make more informed decisions when choosing your paper!
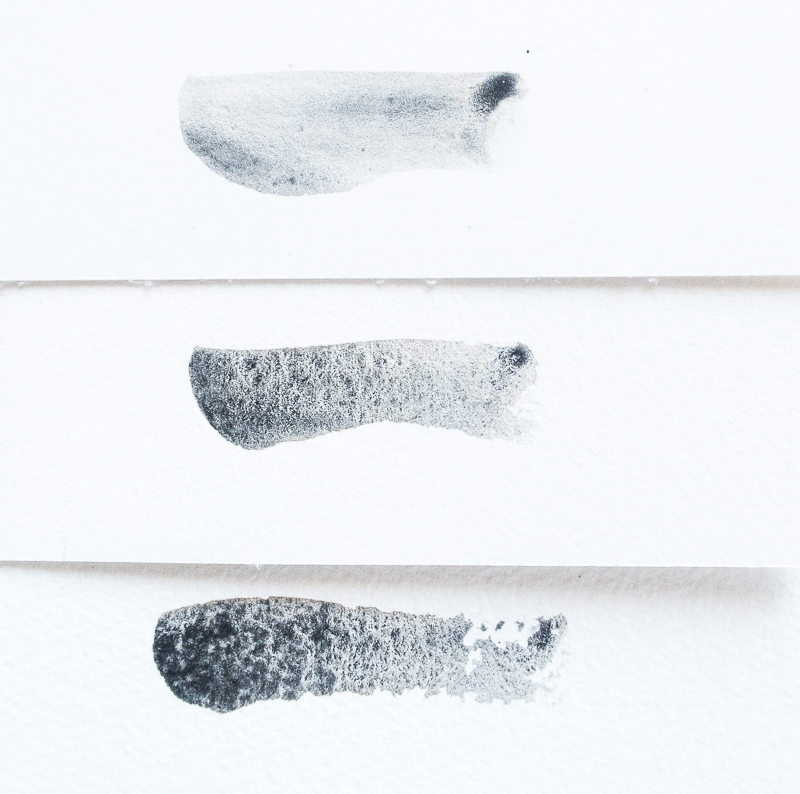
From top to bottom: Hot Press, Cold Press, Rough
Texture
There are 3 textures to choose from with watercolor papers:
Hot Press
Cold Press
Rough
Hot Press has a smooth surface.
Made by being pressed by hot metal (like an iron). It is great if you enjoy painting very detailed subjects, for example: botanical paintings and portraits. It is the least absorbent of the 3 textures.
Cold Press has a textured surface.
Made by being pressed by cold metal. This is the most commonly used among watercolor painters, has great absorbency and keeps paint looking vibrant after drying. You can still paint detailed work, but not as finely as hot press
Rough has the most textured surface. It is also the most absorbent and allows pigments to settle into its deeper valleys. Great at achieving a textured look without fine details.
Quality
Watercolor papers are divided into two general grades: Student Grade and Professional or Artist’s Grade)
The biggest difference between student grade and professional grade paper is what they are made of and how they are made.
Student Grade
Typically made from a combination of cellulose and wood pulp. This doesn’t absorb water the same way that cotton does so you get different results when painting.
Usually machine made. This process results in a different type of surface texture. For example I’ve noticed cold press student grade typically has less texture than professional grade cold press.
Almost always is non-archival. Student grade paper is (usually) not pH neutral which means that it will yellow over time.
Professional Grade
Typically made from 100% cotton. You’ll also see this called “rag paper” or “cotton rag”. Cotton paper absorbs water in a beautiful way and helps us achieve that watercolor look when painting.
Usually mould made. Professional grade cold press and rough papers have a nice textured or “toothy” surface. Handmade papers are considered the highest grade.
Will always be acid-free/pH neutral and archival quality.
Weight
Watercolor papers come in 3 weight classes. The weight denotes how thick the paper is. For reference, typical computer paper is 24lb and you definitely don’t want to be using that for watercolors!
Light - 90lb / 190gsm
Medium - 140lb / 300 gsm
Heavy - 300lb / 640 gsm
Most experienced painters will advise you not to go below medium weight. Anything lighter than 140lb / 300 gsm requires the paper to be prepared before painting either by stretching or taping down the paper to a board.
Stretching is the act of pre-soaking or wetting down the paper and then blotting up the water prior to painting to prevent the paper from buckling under the weight of the water. Taping down the paper on all 4 sides to a board or your table is meant to help achieve the same result.
I always use 140lb / 300 gsm paper. If I am working very wet, I will use a block (discussed below under the “Format” section) but usually I can paint on my paper without taping down or stretching it.
Heavy weight paper is used by painters that enjoy working very wet with watercolors. I know many professional watercolorists only use 300 lb / 640 gsm paper for their projects. Who doesn’t love a nice, thick, and substantial paper?
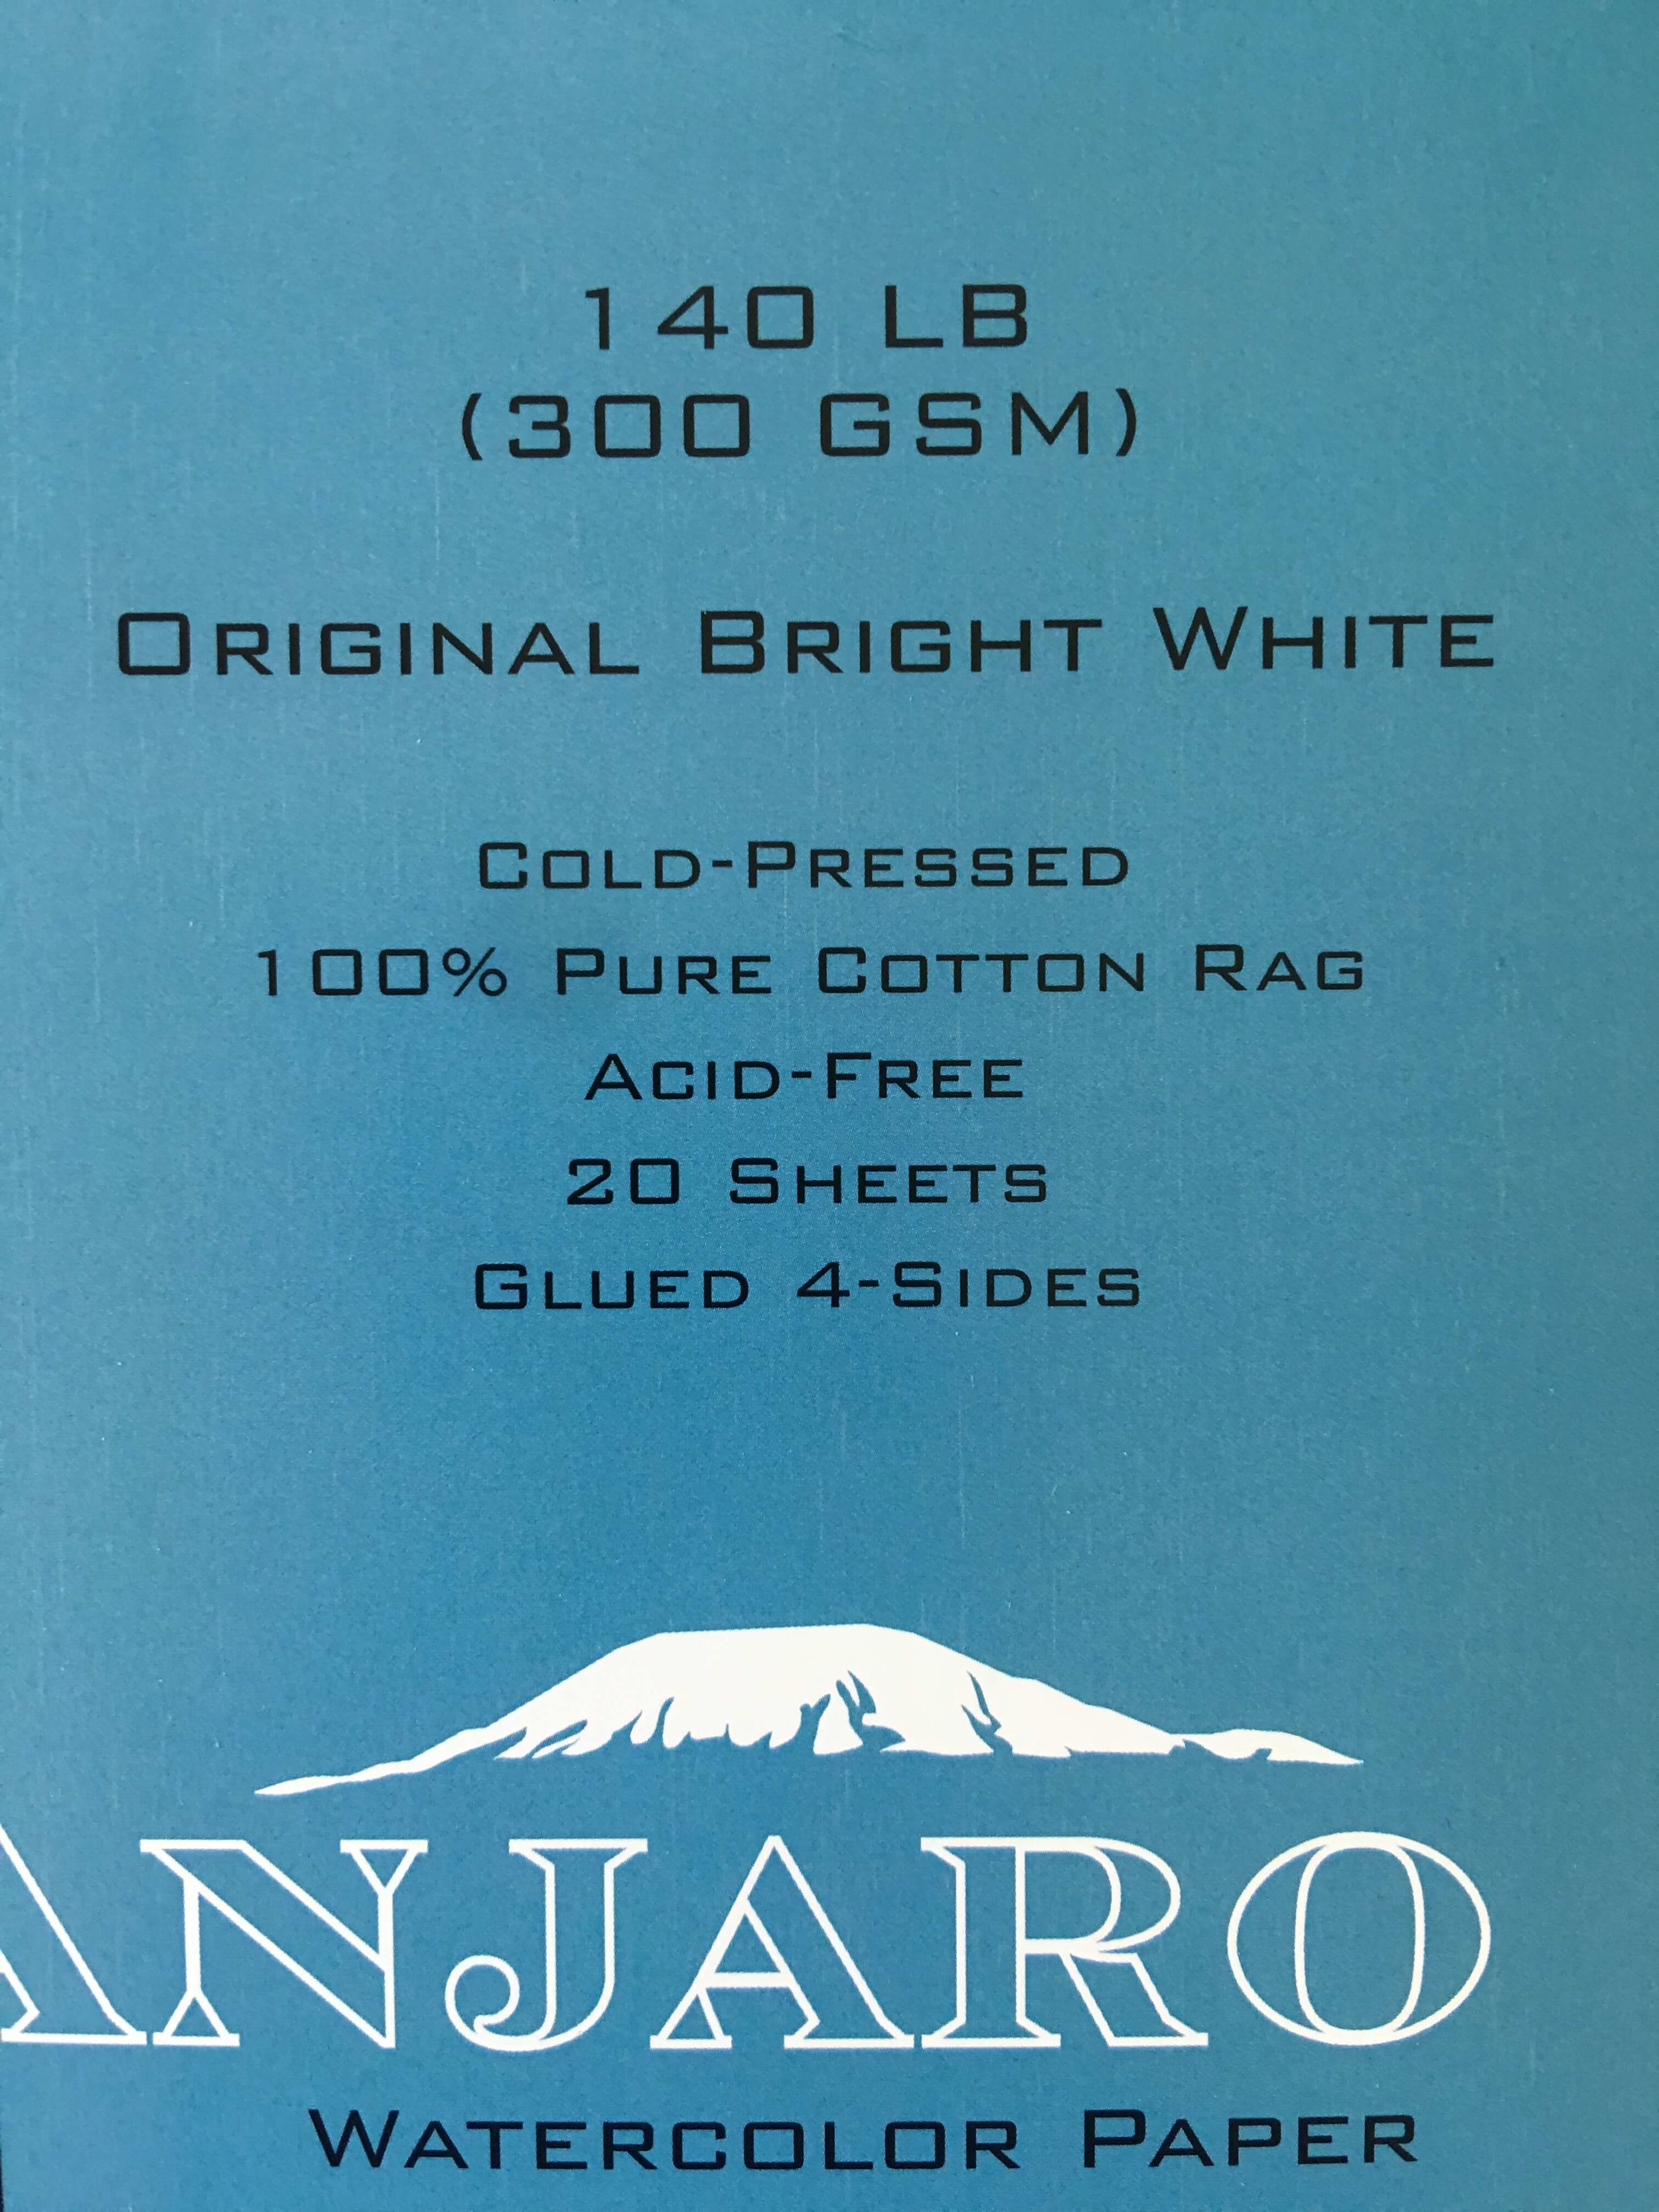
Paper Weights are noted on the cover!
Free Bonus: Watercolor Paper Comparison Chart
Format
Watercolor papers can be bought in different formats:
Pads
Blocks
Sheets (or Rolls)
Pads
Mostly found in student grade papers, pads can come either taped on one side so you can tear off one sheet at a time or wire bound so you can flip the page when you are done painting on it.
Interesting side note: Arches (a professional grade paper), also comes in a pad format. But even the Arches pad is manufactured slightly differently than their blocks and sheets! It is a wonderful paper, but in comparison to the Arches block, the pad is not quite as nice!
Blocks
Professional Grade Papers will always have block formats. Blocks are the most convenient as they are glued down on multiple sides (at least 2, usually 4) and allow you to paint without taping down your paper. Because it is held down on all sides means that it is essentially “taped down” for you.
There is usually a gap in the edge where you can insert a flat object and slide it around the edge to release the sheet when you are done painting.
Sheets
If you want to paint bigger than a typical pad or block size, you’d go with sheets. Sheets can be cut down to the size you want. Sheets and blocks are usually seen as higher end and the quality of the paper is going to be top notch. If you’re looking to save some money, buying many sheets and cutting them down to size can be more economical than buying blocks. Just keep in mind the hassle of having to cut papers down!
Sheets also come with deckled edges (sometimes not on all sides depending what size sheet you purchase). A deckled edge is an edge that looks like it has a natural tear. It’s beautiful and some artists want this edge. Just keep in mind if you cut down your sheets you’ll loose the edge on some sides!

Block Sheet Removal Instructions

Deckled Edges on Arches Watercolor Sheets
A Note on Sizing
You may or may not have heard the term “sizing” mentioned in regards to watercolor paper. All watercolor paper will probably have some sizing which is the addition of gelatin to watercolor paper to control absorbance and spread of water. Sometimes this gelatin is added directly into the paper mix or as a coating.
A simplified explanation of sizing is this: Without any sizing, watercolor pigments would spread uncontrollably on the paper. With sizing, it helps give us some control while painting. Different brands use different amounts of sizing so there will be variation because of that. There’s no way to tell how much sizing is used, but this is somewhat of a personal preference and a result of trial and error during your own watercolor journey! But just in case you hear about this term, now you know!
If you google sizing there are many MANY more technical explanations, but I believe that all we need to know is that it exists and may alter our personal experiences of different papers and brands. The more important part (at least to me) is to get painting!
ONE LAST THING (A BONUS!)
That’s right! I also put together a comparison chart for 14 different watercolor paper manufacturers. It tells you what formats are available: pad, blocks or sheets. But I also went through and calculated the cost per sheet of each type so it’s easy to understand a general cost comparison between different manufacturers!
I actually learned a lot myself from putting this together so I hope that you’ll find it useful as well!
If you want to download this and print it for your own reference, just enter your email below and I’ll send it to you!
Free Bonus: Watercolor Paper Comparison Chart
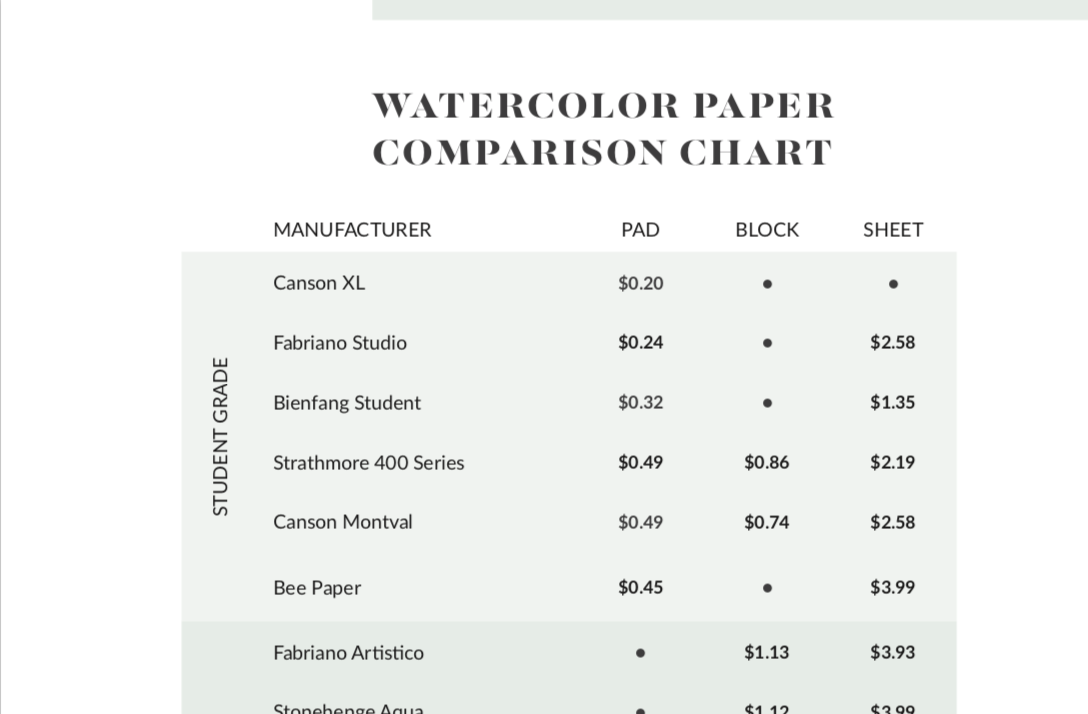
Here's a preview of the chart!
So I hope that this was helpful and informative! Sorting through the different aspects of papers and clearing them up should give you a better sense of what you want to buy next time you’re looking through different paper!
I’ve included an informative graphic below that you can reference in the future if you need it! Feel free to share it, pin it, and comment below if this was helpful!
As always, thanks for reading!
Susan