
Watercolor Tutorial: Herringbone Pattern
When I decided to “doodle” this pattern into my sketchbook last year and record it, I had no idea that it would be so popular. I posted a video of it to Instagram and it has (for some crazy reason) been shared by quite a few of those viral video accounts.
I want to be on the record to say, I am the first person in line to agree that this pattern is by no means a crazy feat or even close to being a masterpiece. I actually came across a hilarious comment from someone responding on one of those video accounts that basically asked: “Why is everyone so amazed by this, it’s not like she’s Picasso.” I laughed and still can’t agree more!
There must be something interesting about this video that made people interested. I think it’s 2 things:
1. People love herringbone patterns as much as I do
2. I painted this freehand and somehow managed not to mess up
Once you understand the pattern and the strokes, it’s really not that hard! I’m going to break it down for you so that you can try this yourself.
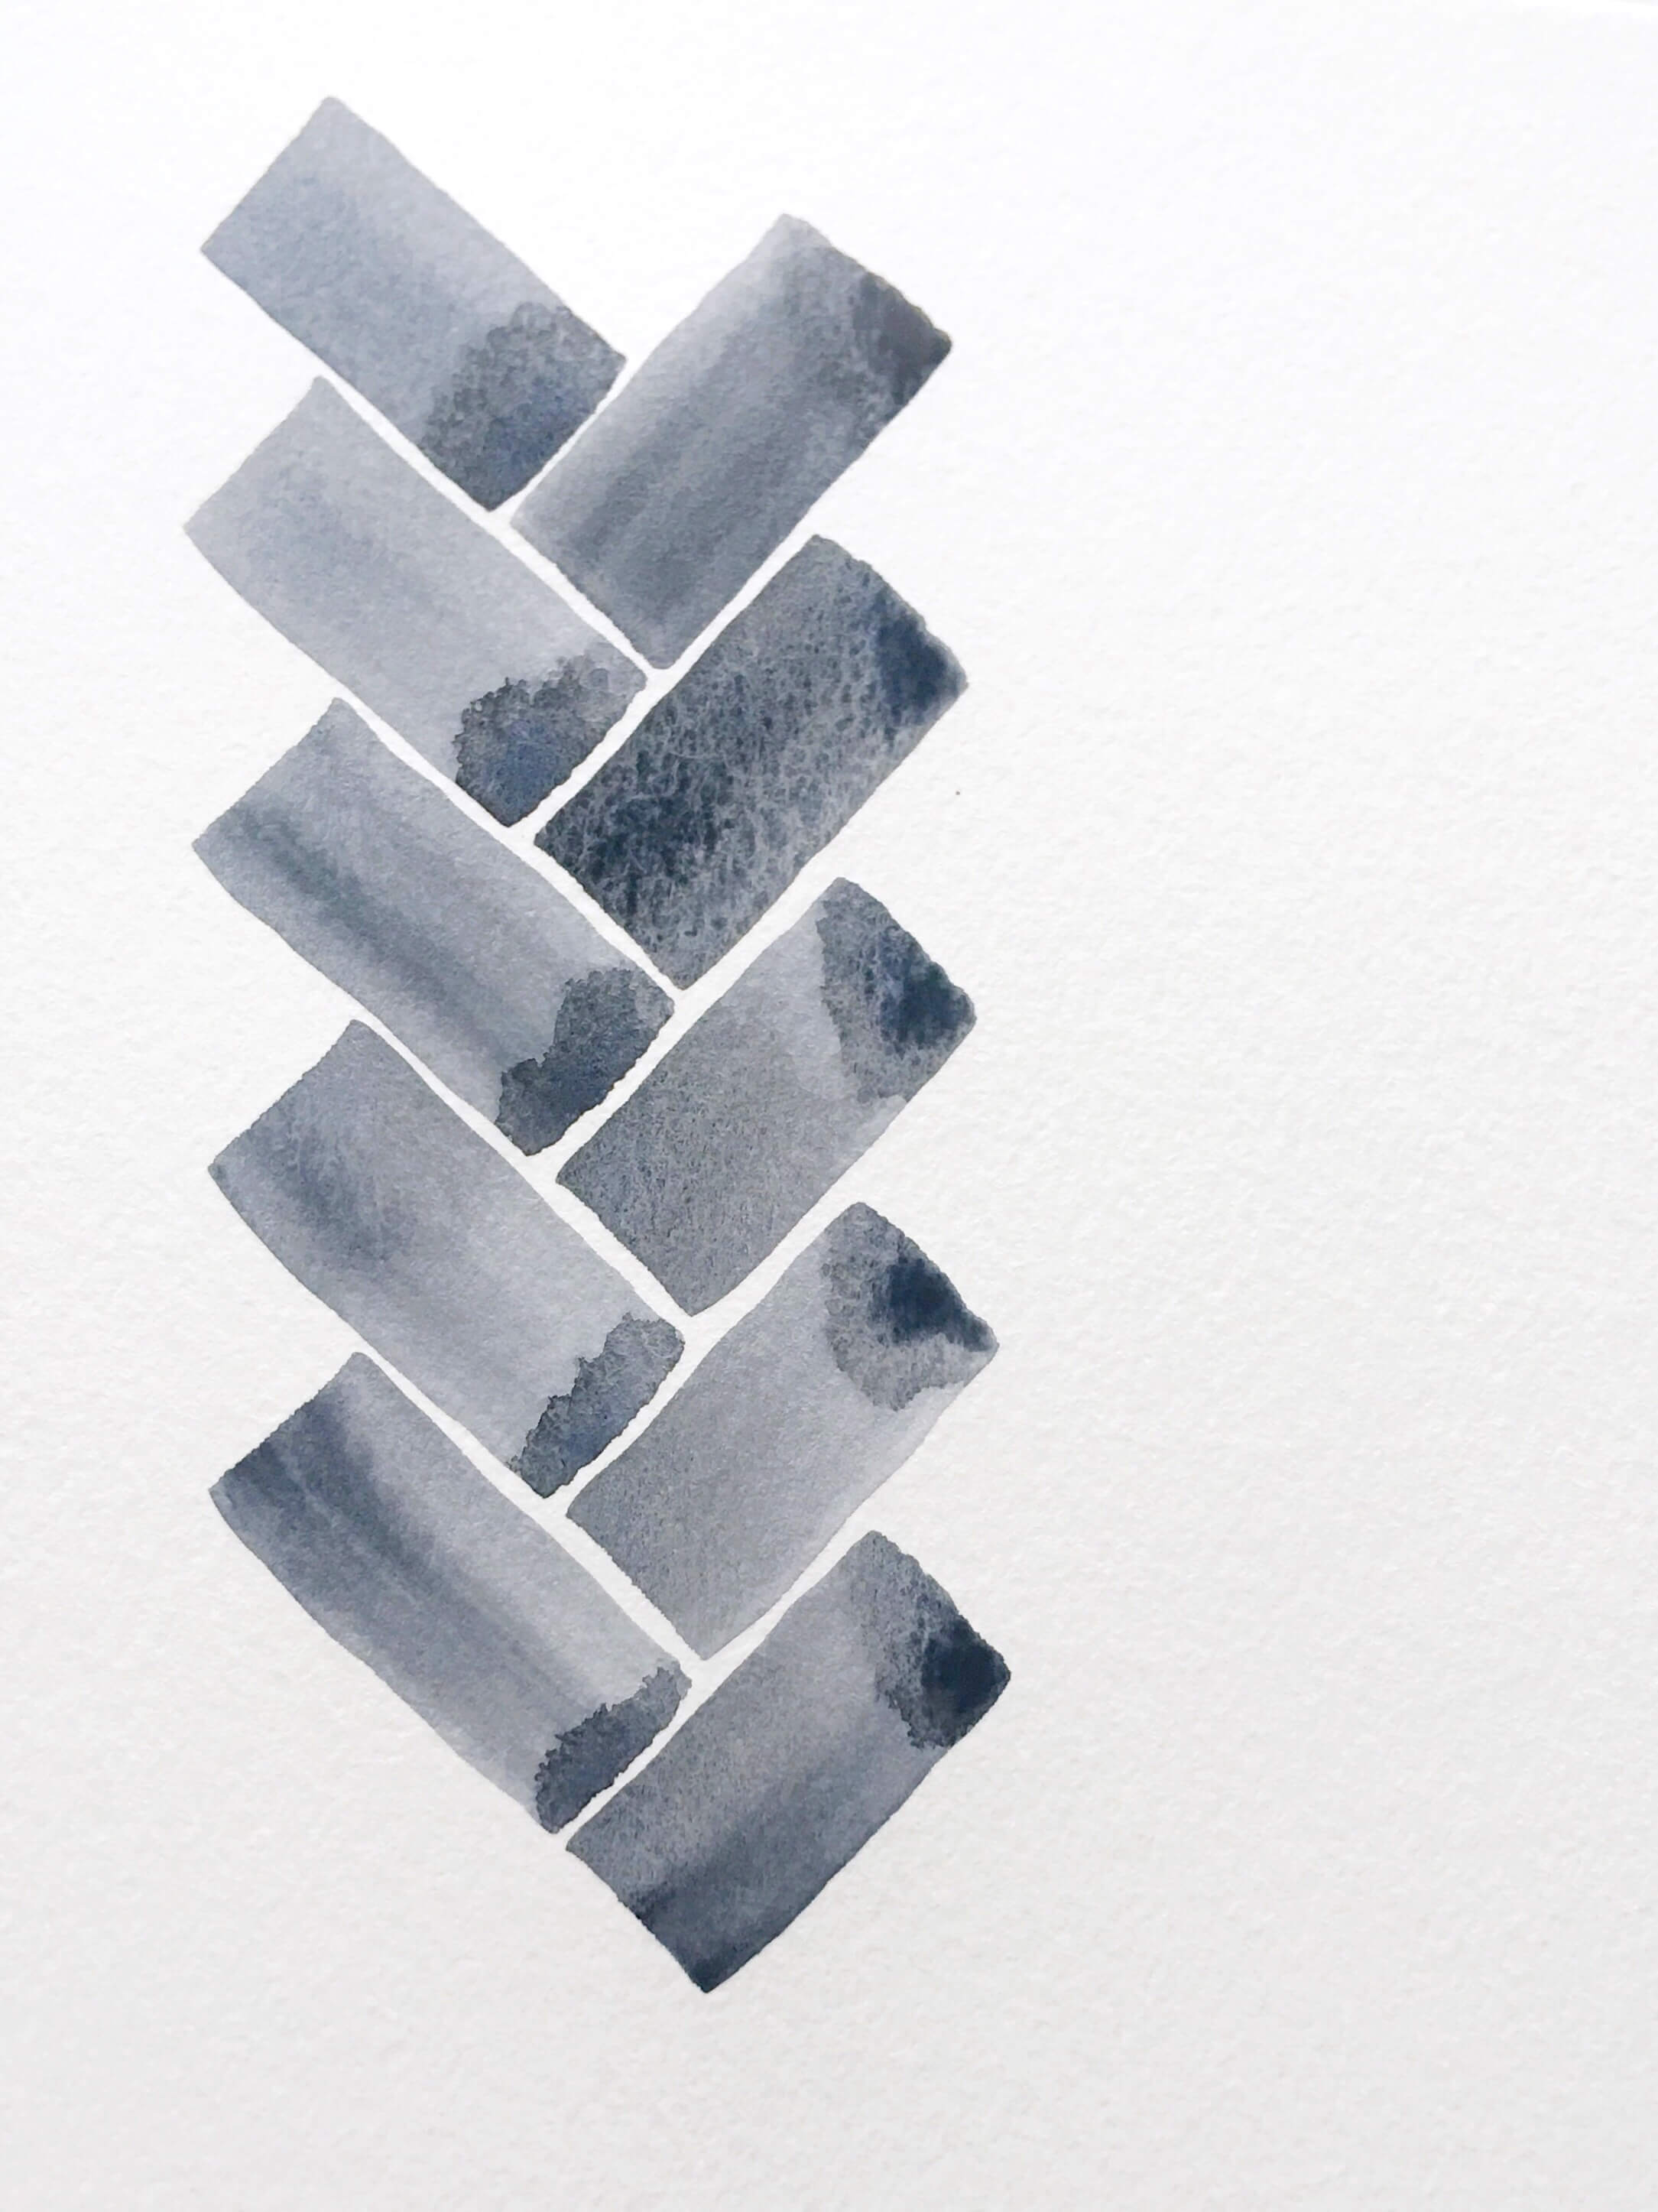
Step 1:
Use a flat brush. I’m using a 1/2” Flat Brush that is old and from somewhere in Asia (my mom got it for me). I got this question a lot on my post, so if you want a similar brush, it looks a lot like this one from Princeton (affiliate link!).

Step 2:
Get a handle on the ONE shape you are painting. Hint: It’s a rectangle.
I kept in mind that I was painting one stroke at the same length, every time.
If you have to practice, try painting dashes over and over and practice getting the length right every time
Step 3:
Study the herringbone pattern. Herringbone are interlocking rectangles at an angle. The trick is to get the rotations right.

Image Source: www.inchcalculator.com
Step 4:
Paint the pattern column by column. I did not do this in the video and you can actually see me pausing to make sure that I’m making the right stroke.


That's really all it takes! I do have a few tips for you if you're going to try this yourself!
Tip 1: Stay aware of dimensions and spacing as you paint!
Here's a little cheat diagram of what I think about while I paint this pattern. What this diagram is trying to tell you is the following:
Notice where you start each stroke as you move down the first column. Each stroke starts at the 1/2 way point of the stroke before.
Once I reach the second stroke of the second column, I like to align the end of my rectangle with the long side of the first column's rectangles. It's an easy visual reference point while painting.

Didn't know watercolor painting could get so technical, did you?
Tip 2: MIND THE GAPS
Keeping your strokes consistent is just as important as keeping the gaps BETWEEN the strokes consistent. Watch the negative space and the spacing between the rectangles. The tighter you can get, the more impressive your pattern will look! Think of the grout lines in between the tiles in your kitchen or bathroom. They are pretty small!

More vs. less white space
Tip 3: BACKRUNS? WHAT BACKRUNS?
Don’t worry about the back runs from the paint. When you pick up the brush, it’s going to leave a pool of water, but just leave it alone. I know that’s what bothers a lot of people when painting with watercolors, but II think that’s what made the pattern really interesting, actually!
That’s it! I hope that this step by step tutorial along with the video is helpful and that you try it out yourself! See the link below for the timelapse video of my original herringbone doodle!
Thanks for reading!
Susan
